Limelights are series of pre-packaged all-in-one vision systems that are used on many FRC robots for their simplicity coupled with raw performance. They were originally made by a mentor from FRC Team 987 (HIGHROLLER Robotics), and have spread to most FRC teams seeking vision solutions.
The list of Limelights one might encounter in today’s FRC would be the Limelight 2, Limelight 2+, Limelight 3, Limelight 3G, and Limelight 4. Limelight has made it quite easy to work with these cameras from flashing to playing with capture settings, the process is simple.
Getting Started
To get started working with Limelight Cameras or any Limelight product in general, you first have to download the: Limelight Hardware Manager.
Flashing OS
Flashing to OS of your Limelight has been made extremely simple.
Download the latest Limelight OS image
Open your
Limelight Hardware ManagerinstallationPower off the camera
Hold the config button down while connecting a USB-C cable from your laptop to the camera.
Navigate to the tab labeled:
Flash OSSelect the OS image you previously installed and wait for the extraction to complete
Click
Select DevicethenRefresh Devices ListSelect your target Limelight from the list
Click
Flash Deviceand wait for it to completeOnce complete remove the USB cable
Network Configuration
Setting the Team Number
Power up your robot and connect your laptop to your robot’s network
Open the Limelight Hardware Manager, scan for Limelights, and double click the entry that appears
Alternatively, navigate to http://
limelight .local:5801
Go to the “Settings” tab
Enter your team number and press “Update Team Number”
Setting a Unique Hostname
In the settings tab navigate down to the
HostnameboxEnter a unique name for each camera
Click
Change Hostname
Setting Static IP
Change
IP AssignmenttoStaticSet IP address to
10.TE.AM.11Team 254 uses 10.2.54.xx
Team 9106 uses 10.91.6.xx
Team 2056 uses 10.20.56.xx
Team 4915 uses 10.49.15.xx
Set Netmask to
255.255.255.0Set Gateway to
10.TE.AM.1Click
UpdatePower-cycle your robot
Access your config panel at
10.TE.AM.11:5801and camera stream at10.TE.AM.11:5800If you are using multiple Limelights, give each Limelight a unique static IP address. Gateways and Netmasks should be the same across Limelights.
Web Interface
Accessing the Interface
After setting up your Limelight’s network config:
Power up your robot and connect your laptop to your robot’s network. Alternatively you can connect to the camera through USB if using a
Limelight 3GorLimelight 4.Use one of these methods to access the web interface:
Method 1: Open the Limelight Hardware Manager application, scan for Limelights, and double-click on your Limelight when it appears
Method 2: Open a web browser and navigate to http://
limelight .local:5801 Method 3: Open a web browser and navigate to your Limelight’s static IP address with port 5801 (if configured)
Method 4 (USB): Connect via USB-C and navigate to:
Windows: http://
172 .28 .0 .1:5801 Linux/Mac: http://
172 .29 .0 .1:5801\
Accessible Features
Once connected, you’ll have access to:
Settings tab: Configure team number, hostname, and other system settings
Vision Pipeline tabs: Set up and tune your vision processing pipelines
Camera & Crosshair tab: Adjust camera settings and crosshair parameters
3D Visualization tab: View real-time AprilTag detection and localization
All configuration is done through this web interface. Changes are saved automatically to your Limelight.
Other Configurations
Focusing the Lens
Power-on your robot.
Connect to the web interface as described in Accessing the Interface
Click the
Ignore NT pipeline indexto enable pipeline switching, and switch to pipeline 9Set the pipeline type to
focusGo to the configuration tab, and increase stream quality to maximum 6.Make sure the camera is pointed at something with lots of features and contrast, such as an ARUCO board, a detailed scene, or a Siemen’s Star
Turn the lens to maximize the on-screen focus score
Once focused, apply 3-8 dots of
super glueorsuper gelaround the lens
Pipeline Setup
There are many different settings to tune to achieve optimal performance. As it would take a while to explain here is the documentation as explained by Limelight.
Hardware Setup
Mounting Limelight
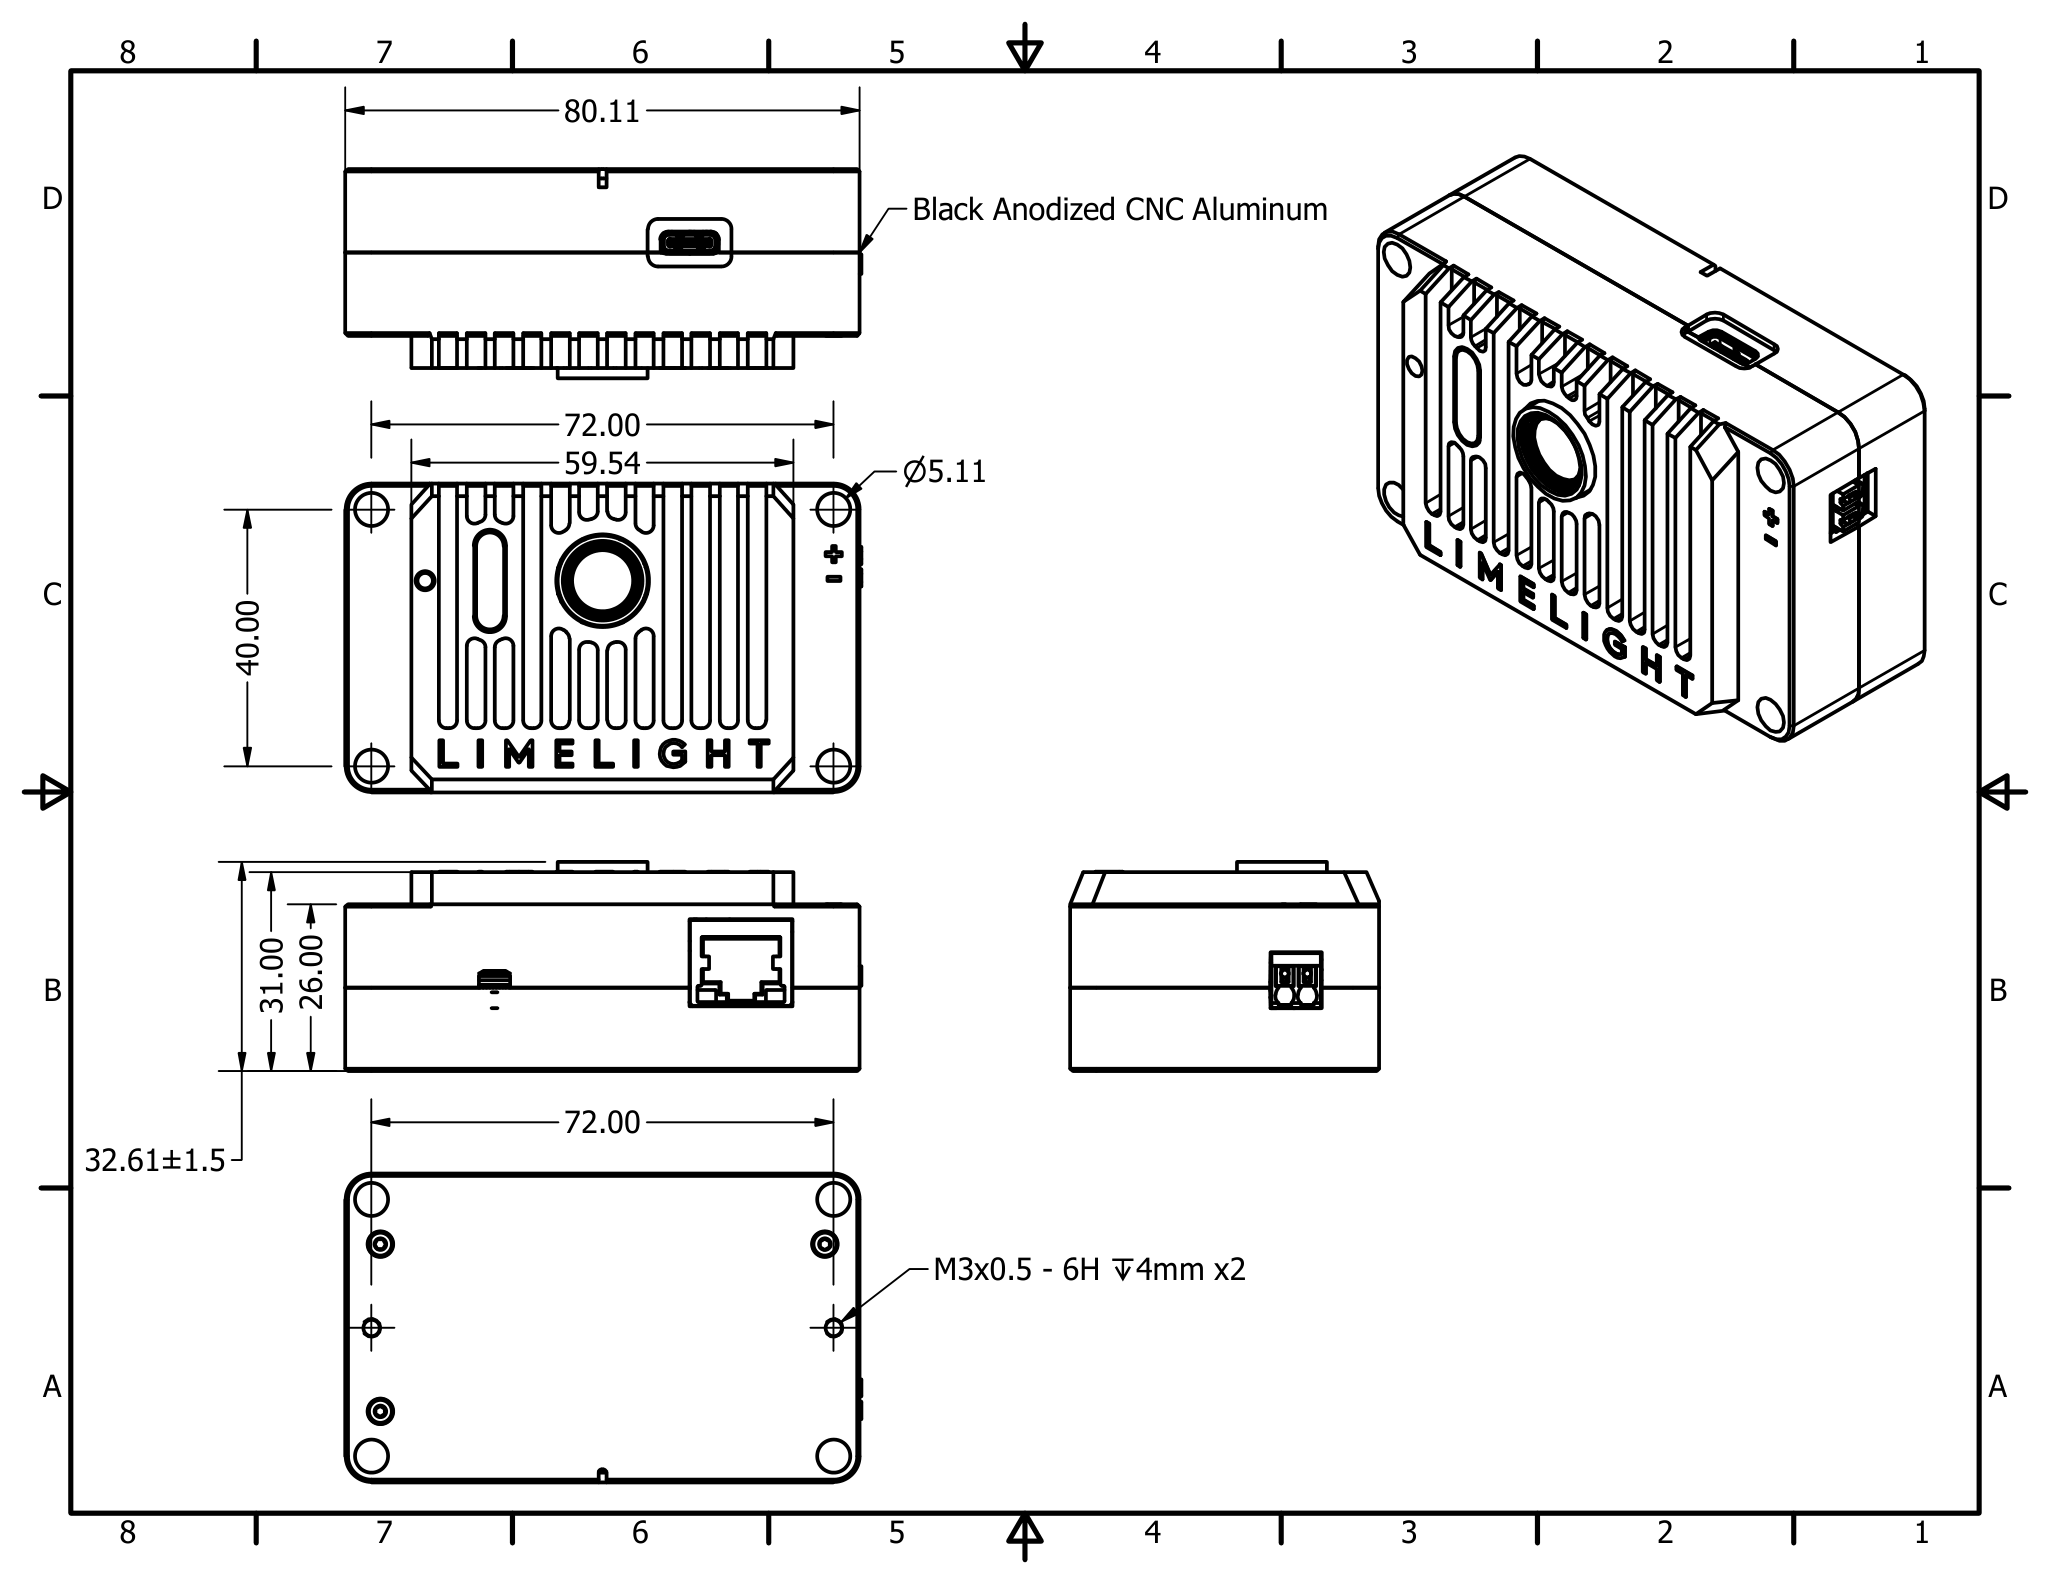
Thru-Hole Mounting
Use
1 1/4" #10-32or#10-24screws with nylock nutsAlternatively, use
38mm M4 boltswith nylock nutsUse plastic washers to preserve anodization
Threaded Mounting (Backside)**
2x M3 threaded mounting points
Consider light application of Threadlocker
Wiring your Limelight
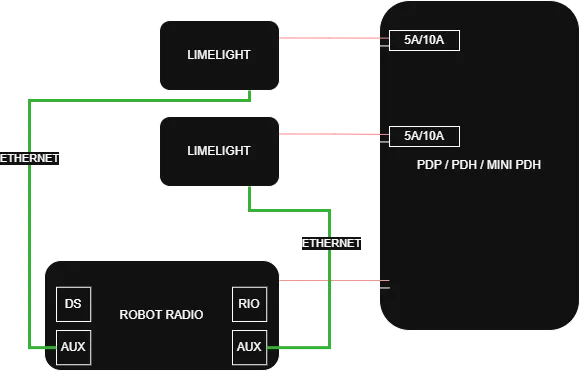
Power
Run two 18-20AWG wires from your Limelight to a slot on your PDP, PDH, or Mini PDP. It is recommended to use a 5A or 10A breaker.
Ethernet
Run an ethernet cable from your Limelight to your robot radio. Use twisted Cat6 cables with stranded wires (ideally 20AWG). If possible add a strain relief to your ethernet cable.
Troubleshooting
Status Bar Indicator
Slow Cylon (Scanning): No targets detected by the current pipeline
Fast Cylon (Scanning): Targets detected by the current pipeline
Slow Alternating LED Blink: Hardware error (camera cable disconnected, sensor damage, etc.)
Reset IP address
Hold the config button for 10 seconds after your Limelight has booted
Networking configuration will reset to dynamic addressing on next boot
Flashing Limelight OS
Reference the section above all about Flashing OS.